Most stores have two or three colours they care about: the one on the logo, the one on the buttons, and the off-white everything sits on. The cart drawer is the last thing a shopper sees before checkout, so it should look like the rest of the store and not like an app someone bolted on.
Flash Cart Drawer Upsell has always shipped with a row of ready-made palettes, 64 of them. If none matched, you typed your hex codes into each colour field by hand, and you did it again for the next cart, because there was nowhere to keep them. Now there is. You can save your own palette once, and it sits at the front of the row for every cart in your store.
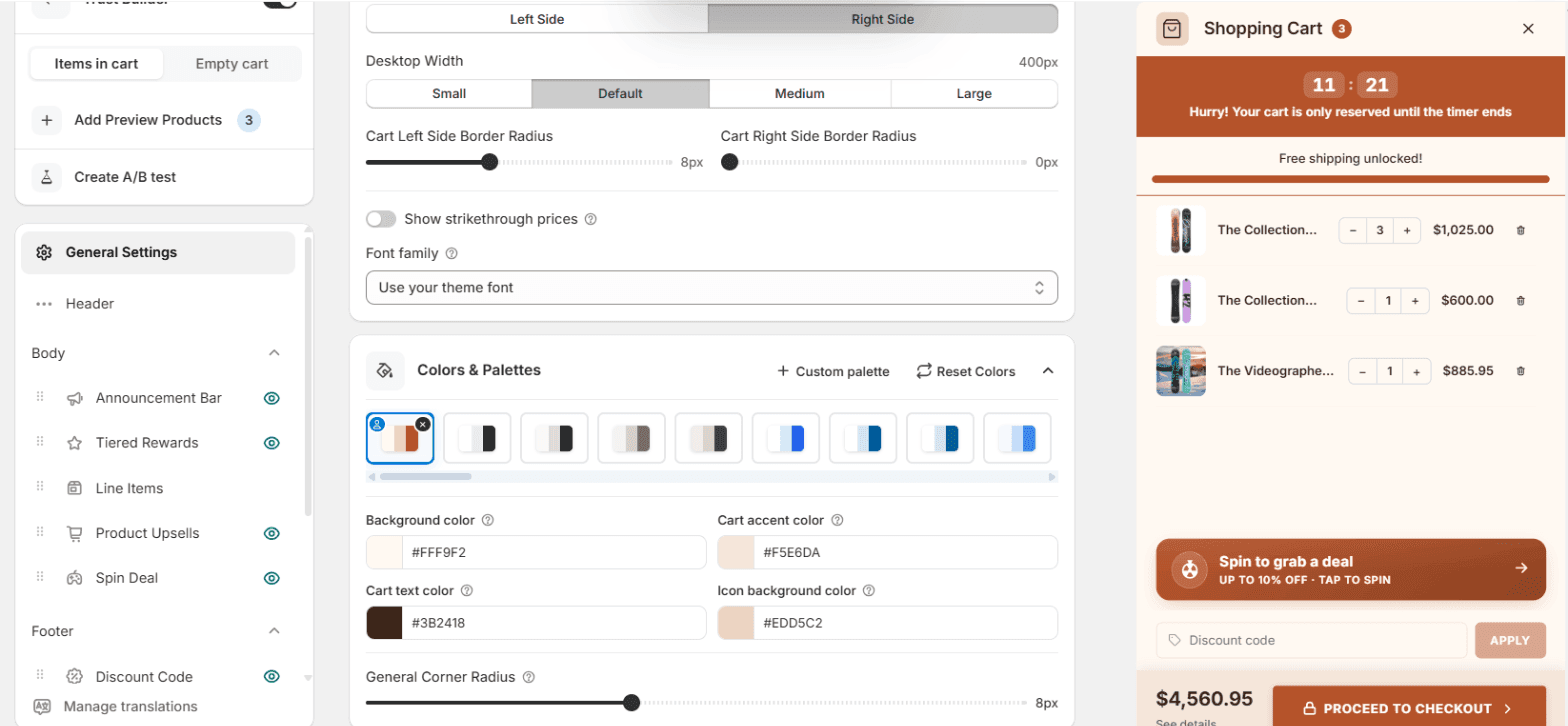
What it does
A palette in the app is six colours:
- Background, Accent and Text for the drawer itself.
- Icon Background for the small tiles and the empty part of the progress bar.
- Button and Button Text for checkout and every other button.
Those six go further than the names suggest. The button colour also paints the announcement bar, the filled part of the progress bar and the “Free” tag on gifts. The accent tints the free gift card. So picking one palette restyles the whole drawer in one click, instead of six cards’ worth of colour fields.
A custom palette is the same thing, with colours you choose. It is saved to your store, not to one cart, so it shows up in every cart you edit.
Making one
- Open the app and click Cart Editor, then open your cart.
- In the left list, click General Settings and scroll to the Colors & Palettes card.
- Click Custom palette at the top of the card.
- Set the six colours. Type a hex code like #B4532A, or click the swatch to use the picker.
- Click Add palette, then Save at the top of the editor.
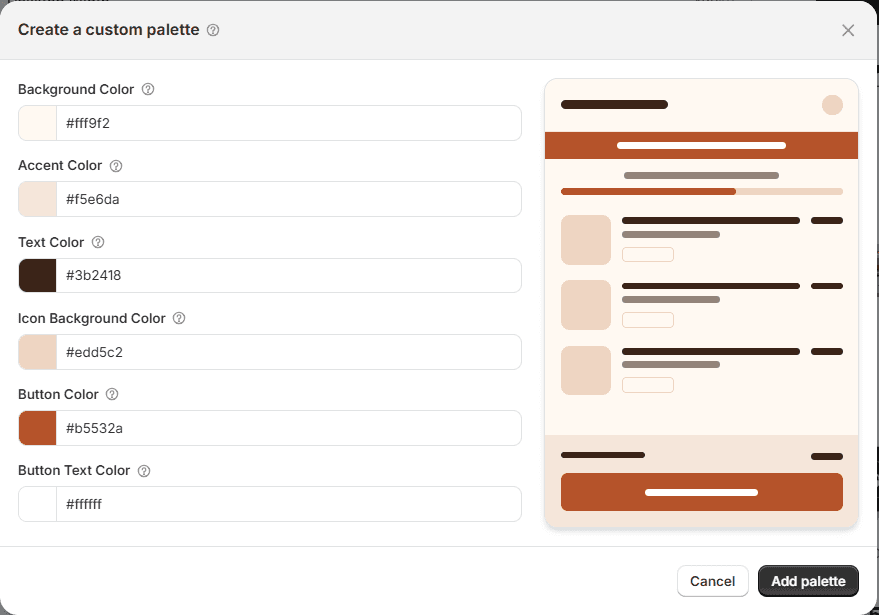
The dialog starts from whatever colours the cart has right now. That is handy if you already tuned a cart by hand: open the dialog, click Add palette, and those colours are saved as a palette without retyping anything.
The new palette goes first in the row, marked with a small person badge so you can tell it from the built-in ones, and it is applied to the cart you are editing straight away.
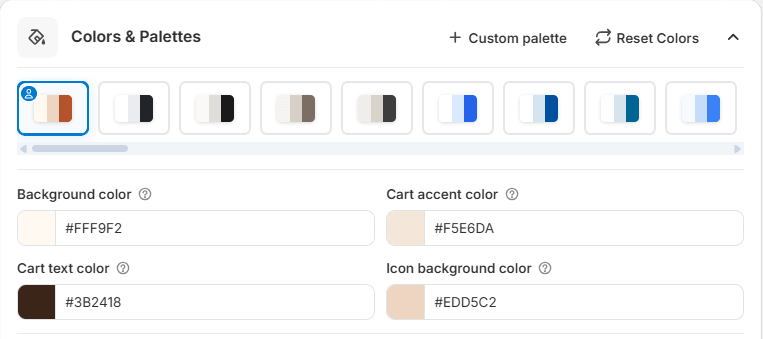
The palette itself is stored the moment you add it. The cart only changes when you click Save, same as any other edit, so you can try it, look at the preview, and discard it if it looks wrong. To remove a palette, hover over it and click the small × in its corner.
What the shopper sees
The same drawer in your colours. Nothing moves around and no text changes. It just stops looking like a default.
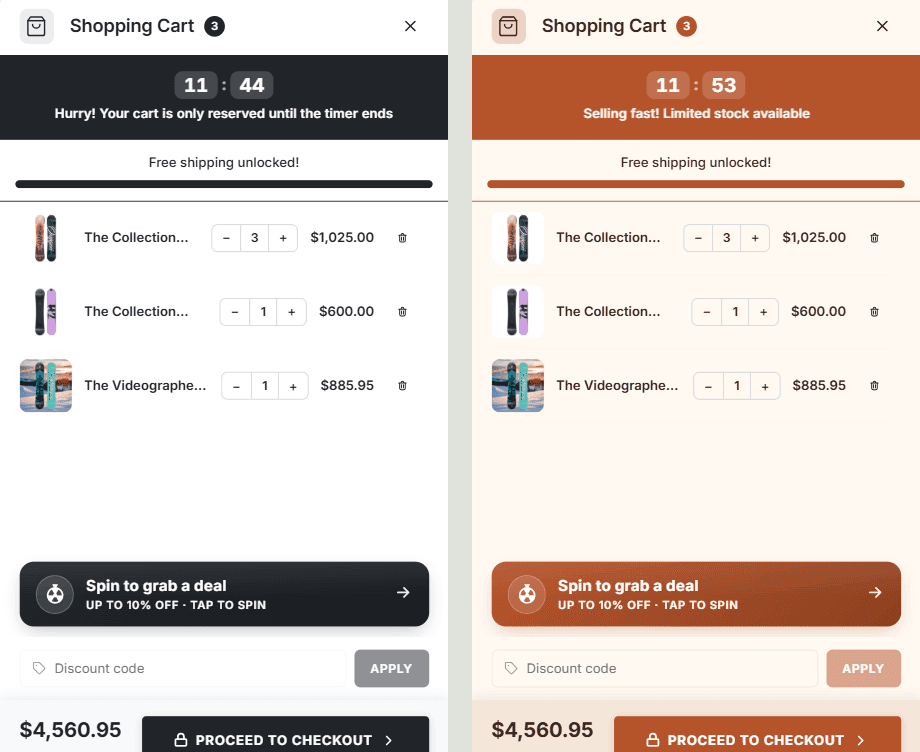
Pick colours with enough contrast between the button and its text. The checkout button is the one thing on the drawer that has to be readable at a glance, on a phone, in sunlight.
Rough edges
What it does not do, so you don’t go looking.
- No editing. A saved palette can’t be changed. Apply it, adjust the colours on the card, and add the result as a new palette. Then delete the old one.
- No names. Palettes show as swatches only. With two or three that is fine. With ten it gets harder to tell them apart.
- 12 per store. Delete one to add another.
- Picking a palette repaints the sections it covers. If you set a custom colour on the announcement bar or the progress bar, choosing any palette afterwards replaces it. Pick the palette first, then fine-tune.
- One store only. A palette saved in one store doesn’t show up in your other stores.
Custom palettes are live now for every store on Flash Cart Drawer Upsell. If your brand colours still look off in the drawer, send me a screenshot and I’ll take a look.